Quick volume calculation with XGRIDS Lixel Studio

TitleVolume calculation based on snow accumulation
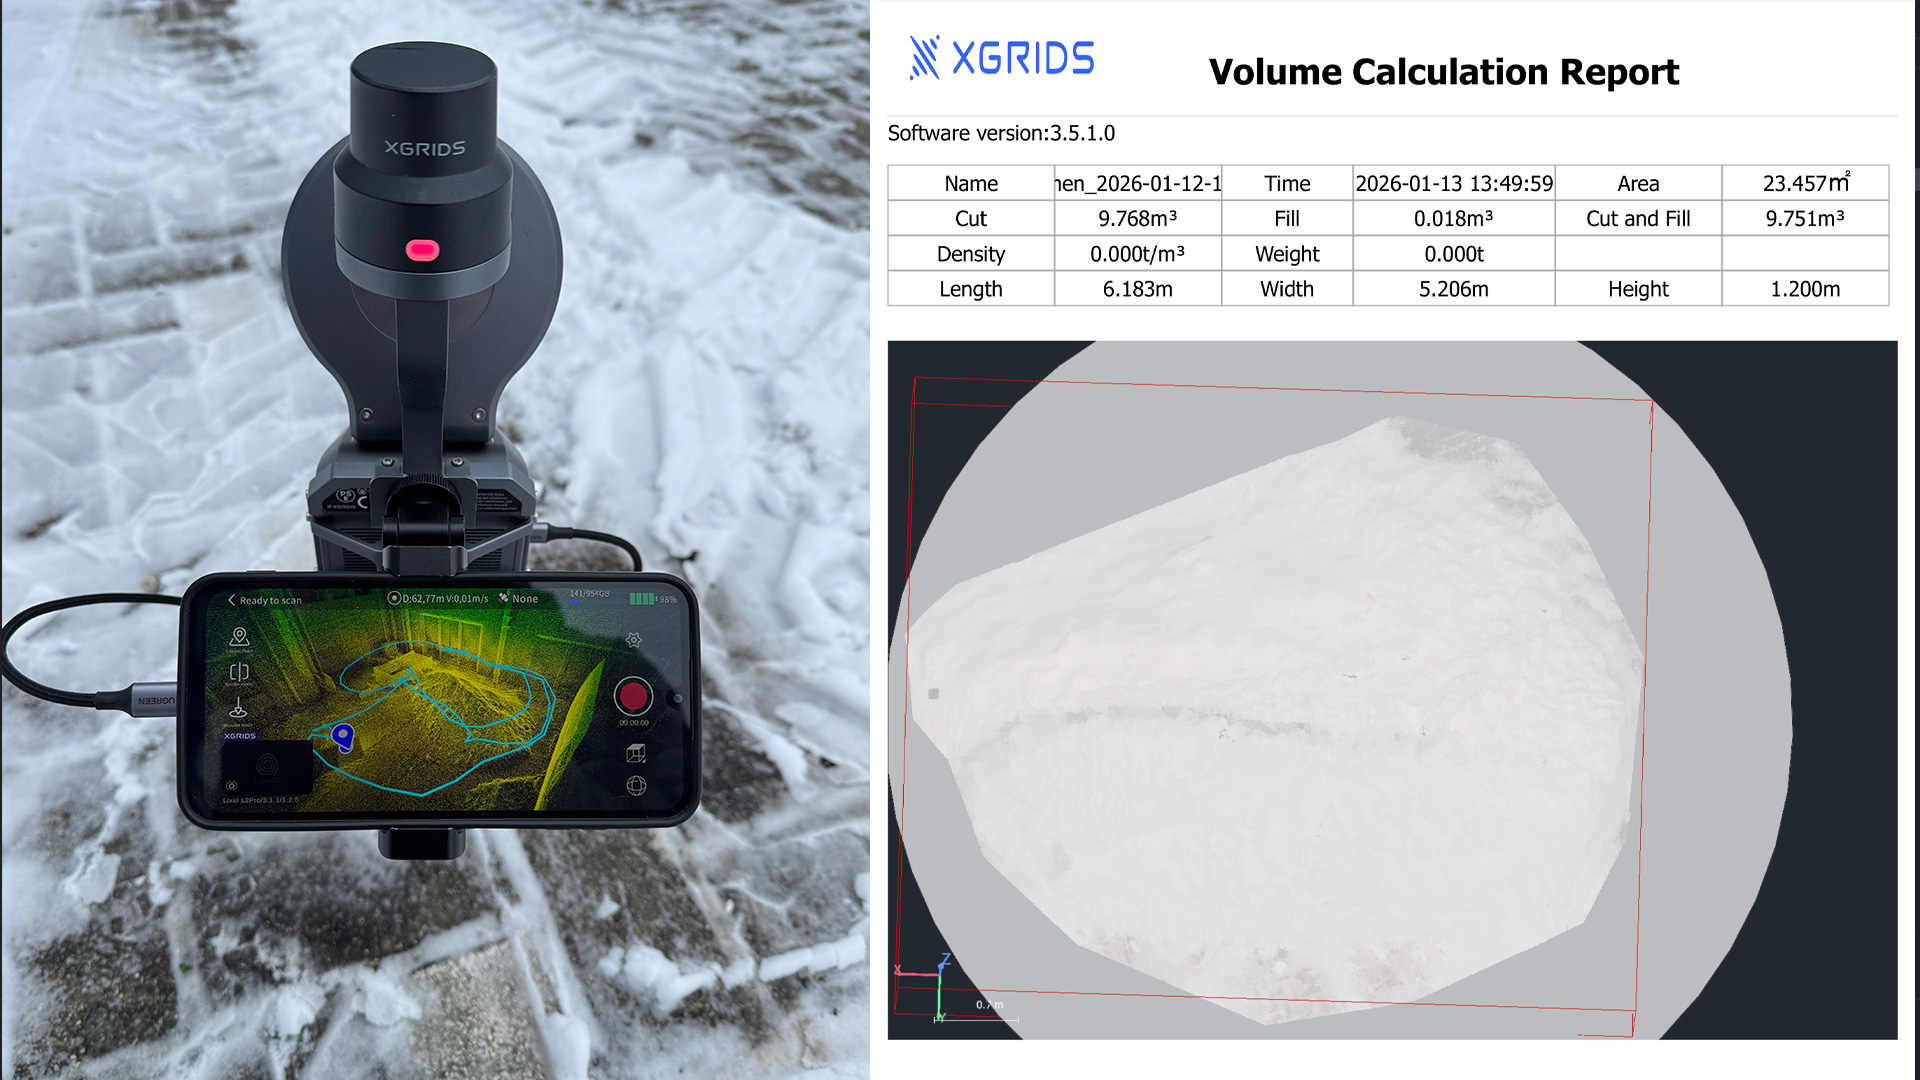
The storm “Elli” provided us with the ideal opportunity to demonstrate volume calculation on a natural snow accumulation. Using the mobile laser scanner XGRIDS Lixel L2 Pro, we want to show how easy and efficient such analyses can be carried out with Lixel Studio.
After just a short time, we were surprised at how straightforward and fast the entire workflow was. Our approach was divided into three clearly defined steps:
- data collection
- data processing
- volume calculation
We present these steps in detail in the following user report.
TitleData collection in winter conditions
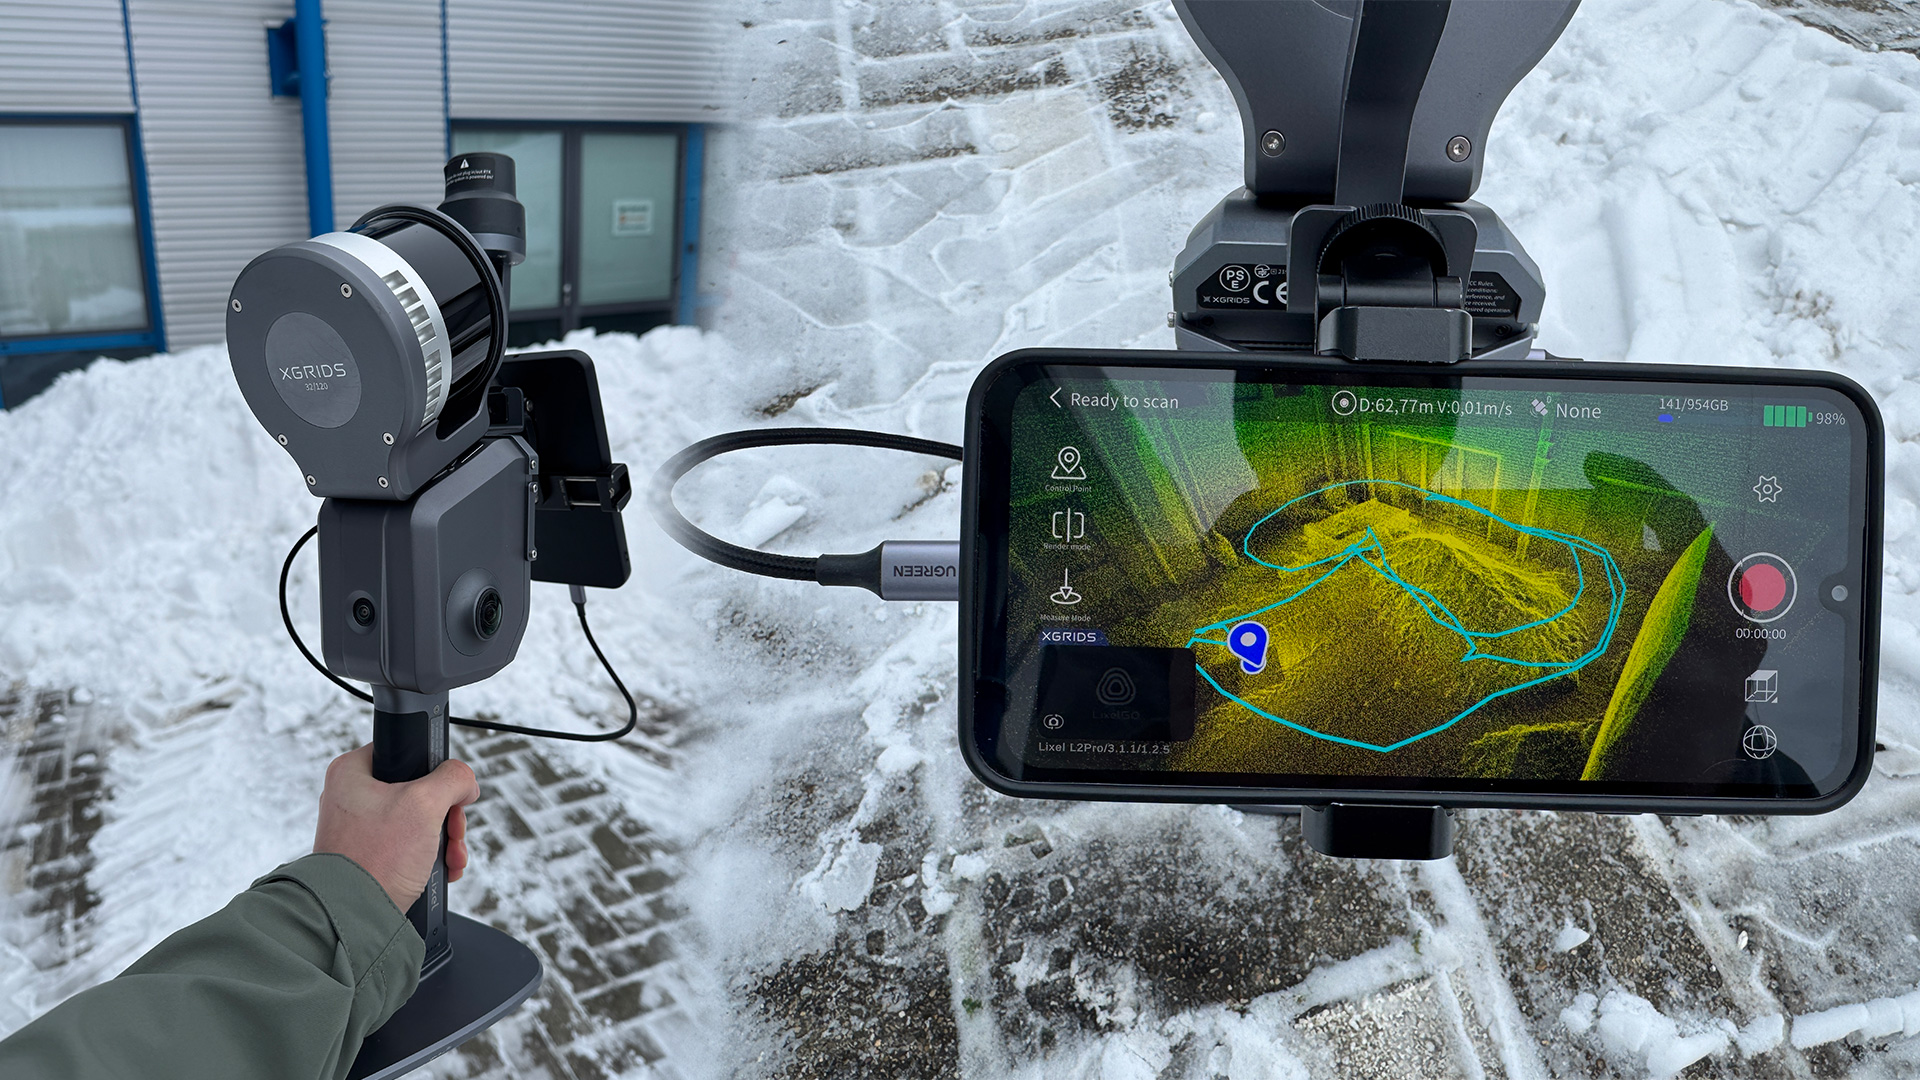
The Lixel L2 Pro mobile laser scanner from XGRIDS was used to record the snow accumulation. In principle, however, a Lixel K1 would also be sufficient for volume calculation, as volume analysis does not evaluate each individual point, but uses a grid model based on them.
The scan time for the small snow mound was around two minutes. A data volume of approximately 1.99 GB was recorded. Despite the cold conditions, data collection was reliable and without restrictions.
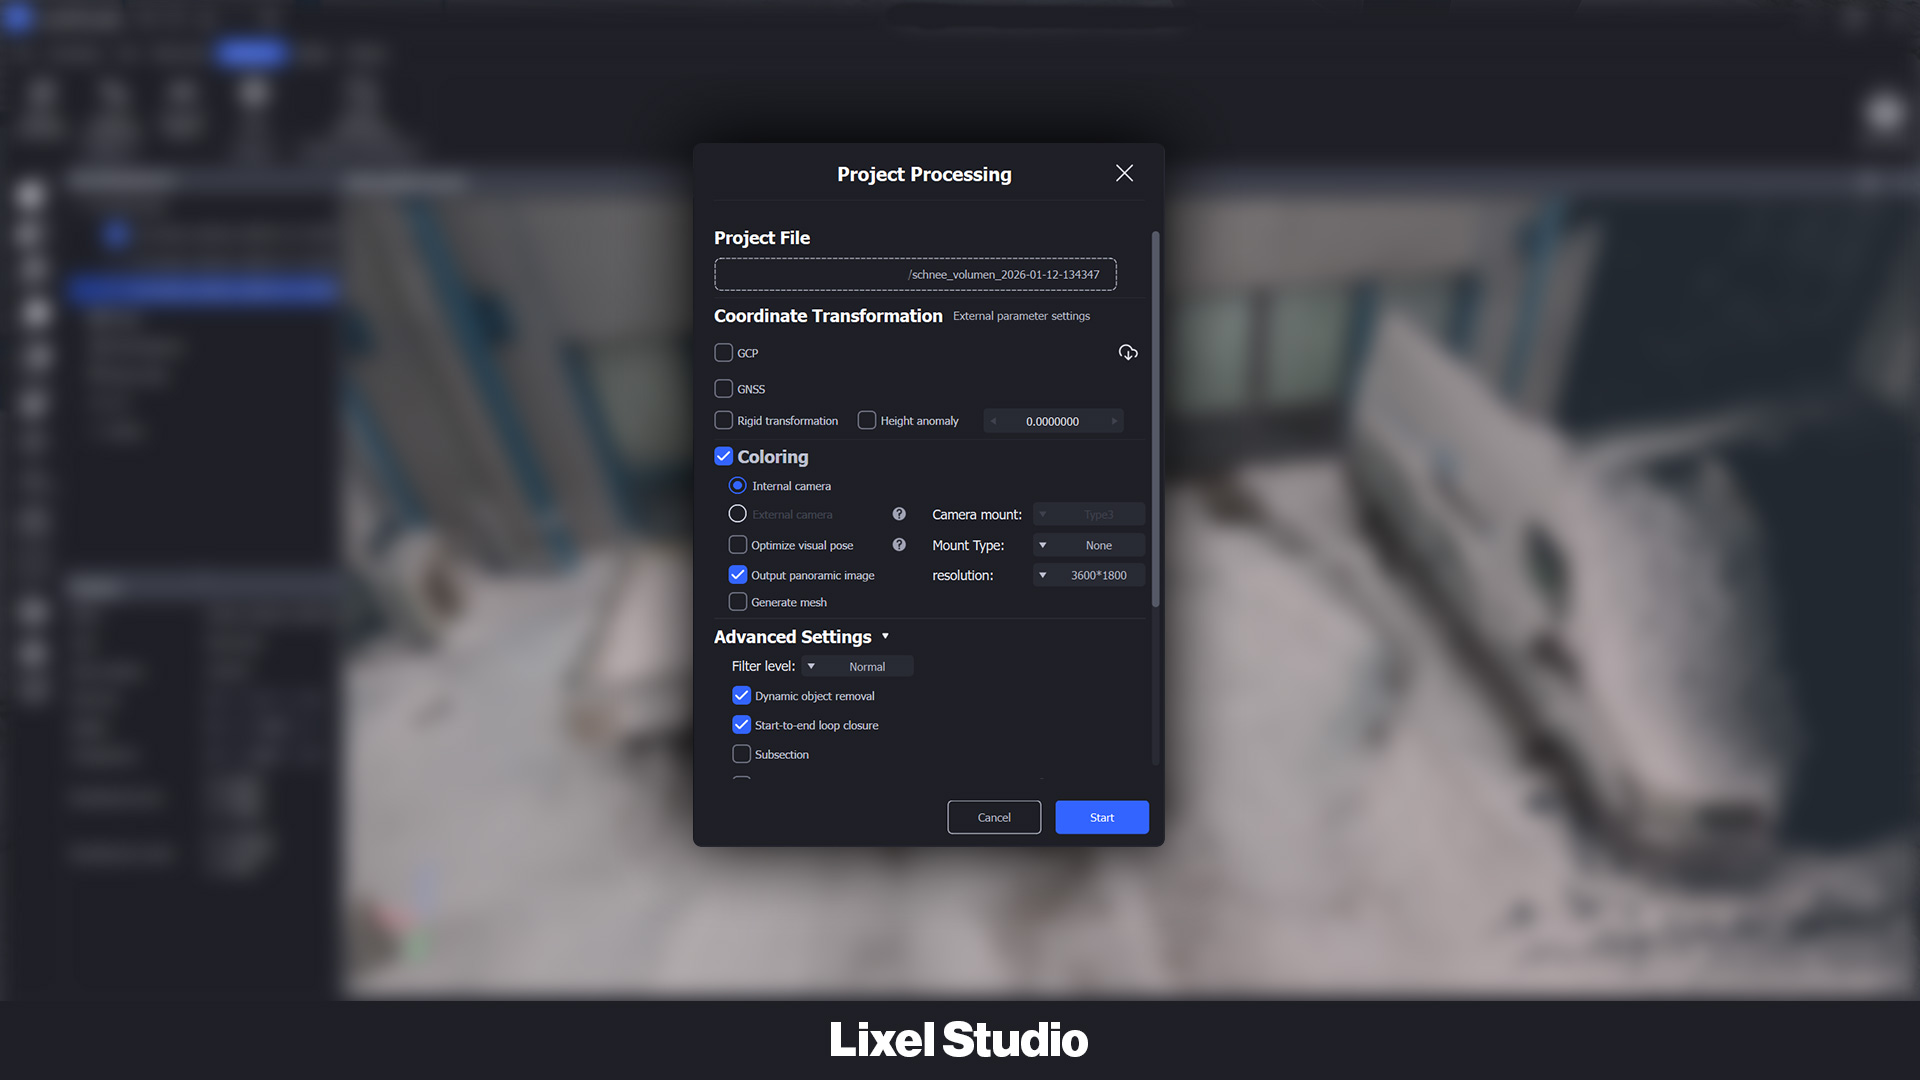
TitleData processing in Lixel Studio
After transferring the data in the warm office, the raw data was processed in Lixel Studio to obtain a clean and evaluable point cloud.
Since only a single scan was captured, we used single processing. The data was processed including color information. Finally, we specified the storage location and selected the option to automatically import the finished processed point cloud back into Lixel Studio.
The entire processing took only 28 minutes.
TitleVolume calculation in Lixel Studio
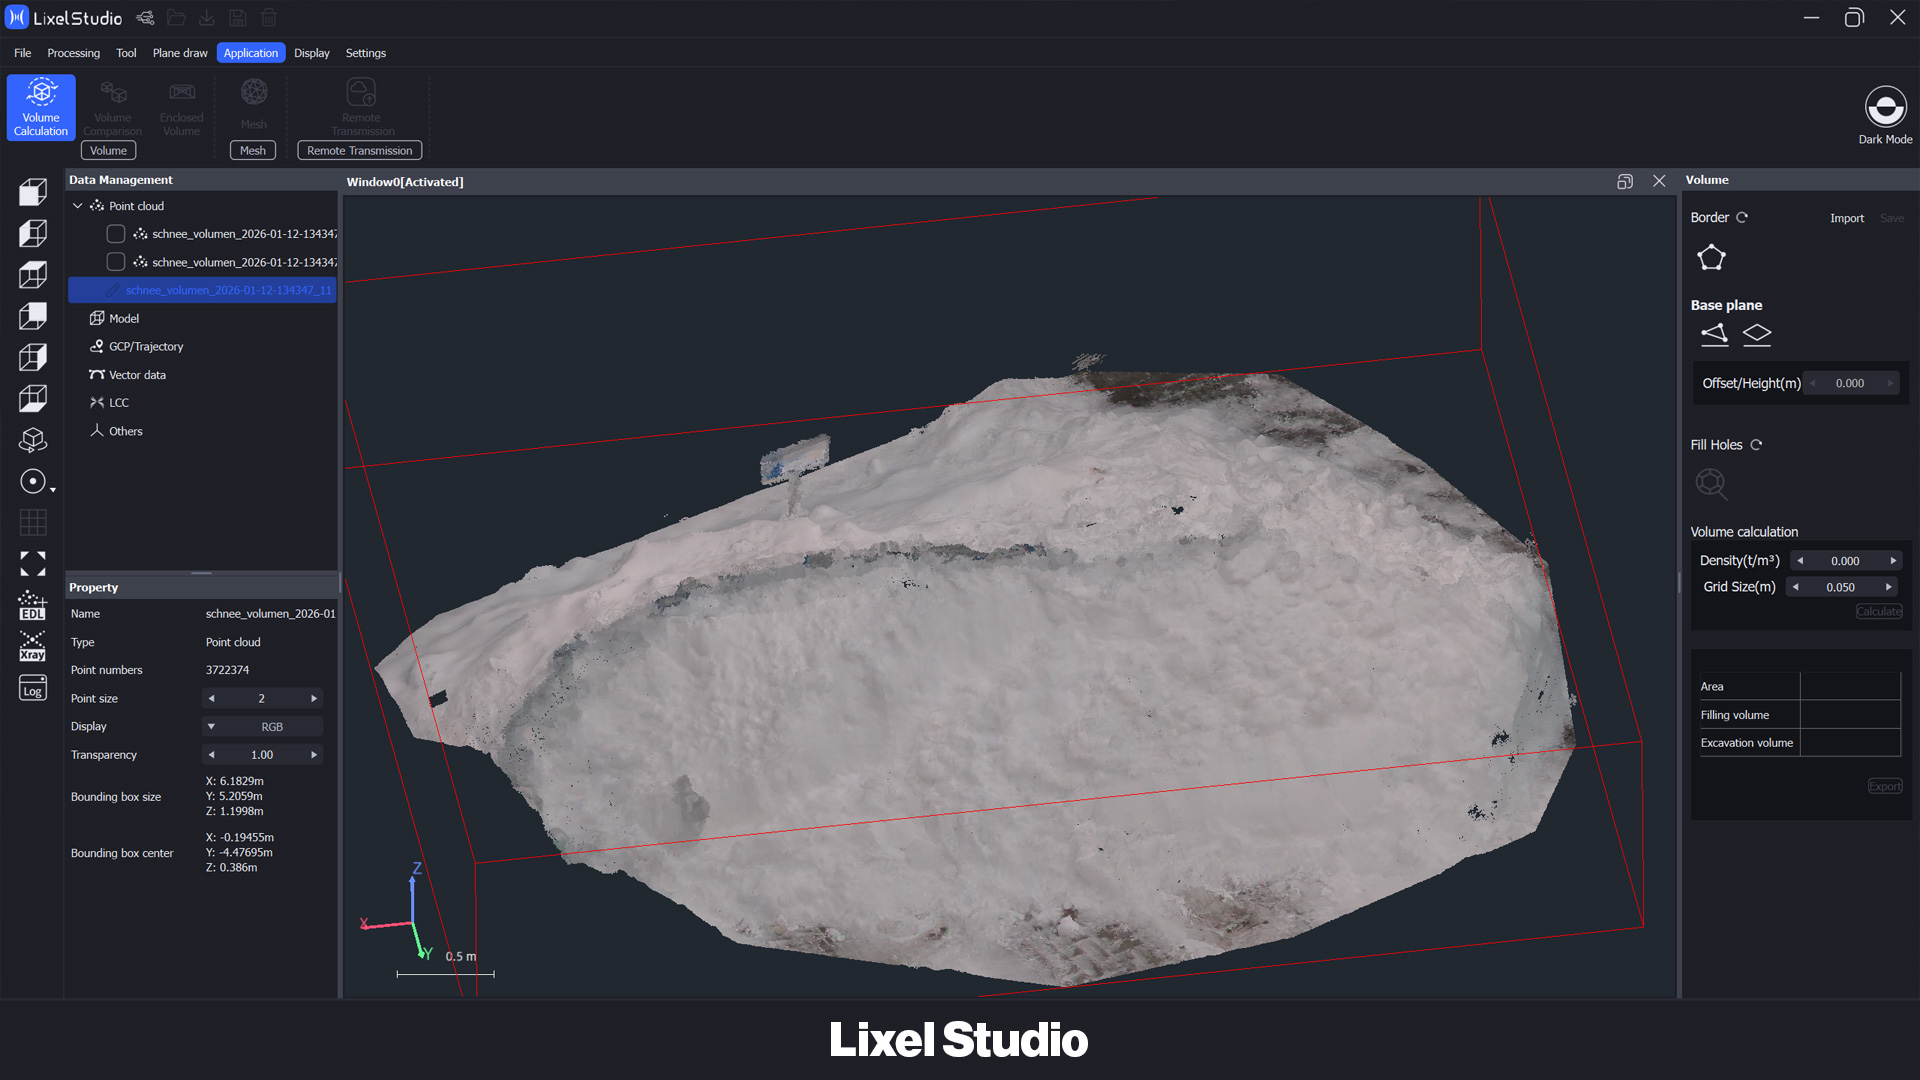
After importing the processed point cloud, we first cut out the relevant snow mound and saved it as a separate point cloud. This step makes it much easier to select and calculate the volume later on.
We then selected the active point cloud and started the Volume Calculation tool under the Application tab.
The first step was to define the ground, which in our case was done using three reference points. Since the snow hill was completely captured, no additional post-processing was necessary. However, if an object has not been completely scanned, Lixel Studio offers the Fill Holes function to close the point cloud accordingly.
After defining the ground, the volume calculation could be started using Calculate. The result was automatically saved as a PDF in the project folder.
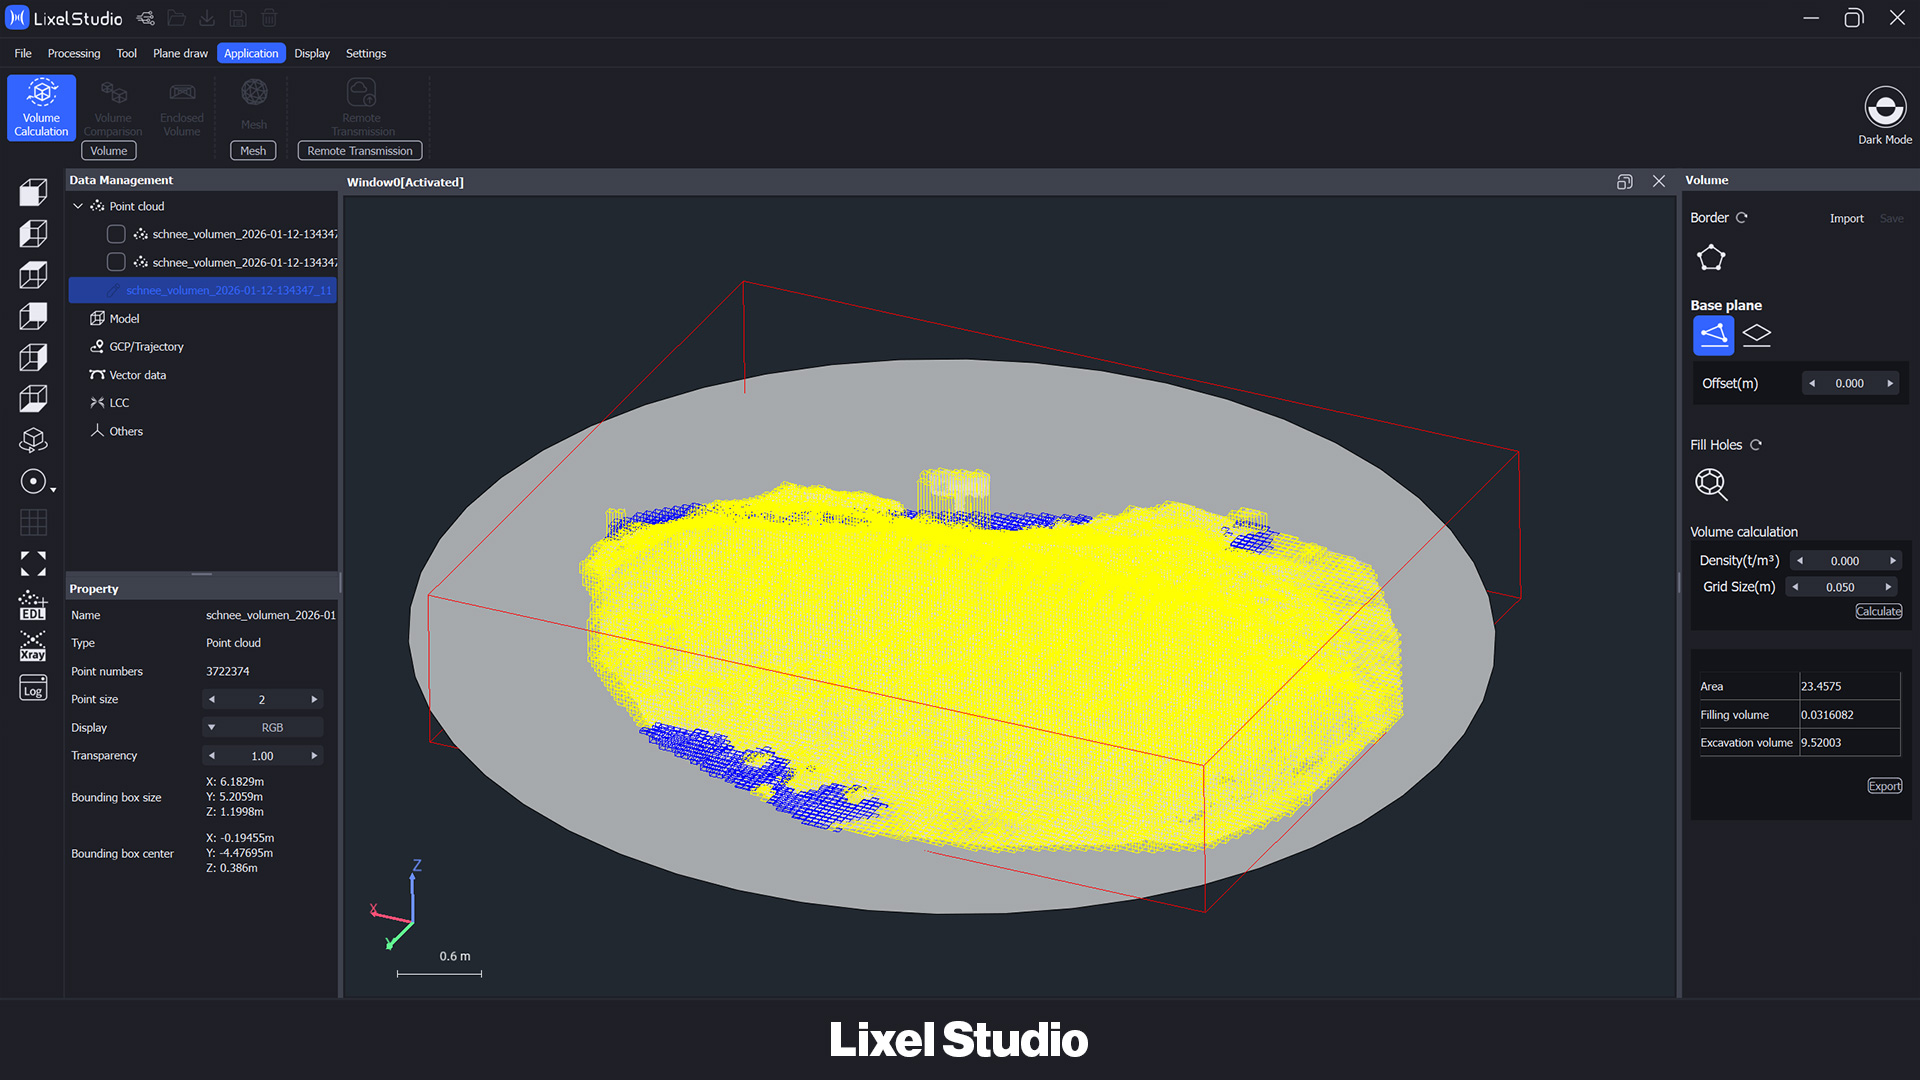
TitleConclusion & closing remarks
This user report shows how easy, fast, and accurate volume calculations can be performed with Lixel Studio. The actual volume analysis took less than ten minutes after processing.
This makes Lixel Studio ideal for practical volume analyses, even under difficult conditions. Overall, it can be said that with XGRIDS Lixel scanners and Lixel Studio, volume calculations can be performed efficiently, reliably, and with minimal effort.